You raise your iPhone to capture a perfect moment. Maybe it is your kid’s winning goal or a sunset on vacation. You tap the shutter button, check the preview, and the image looks soft, out of focus, or just plain wrong. Before you blame the hardware, know this: most blurry camera problems can be fixed at home with a few simple steps. This guide walks you through every possible cause and shows you exactly what to do about it.
A blurry iPhone camera is often caused by simple issues like a dirty lens, a case blocking the sensors, or software glitches after an iOS update. Start by cleaning the lens and removing your case. Then tap to focus, restart your device, and check for updates. If the problem persists, reset your settings or look for hardware damage. Most fixes take under ten minutes and do not require a trip to the local repair shop.
Why Your iPhone Camera Might Be Blurry
A blurry camera does not always mean broken hardware. In fact, most cases trace back to something you can fix in under two minutes. Here are the usual suspects:
- Dirty or smudged lens. Pocket lint, sunscreen, or grease from your fingers can scatter light and soften every shot.
- A phone case or screen protector. Some cases sit too close to the camera module and partially block the lens or the LiDAR sensor.
- Auto-focus confusion. The camera might be locking onto the wrong part of the scene, especially in low light or macro mode.
- A recent iOS update. New software can introduce bugs that affect the camera app or the image signal processor.
- Optical Image Stabilization (OIS) failure. If the camera lens rattles when you shake the phone, the OIS system may be damaged.
- Moisture or condensation. Humidity or a few drops of water can fog the inner lens or corrode internal connectors.
- Third party camera apps. Some apps override Apple’s native camera processing and produce softer results.
Understanding the cause is the first step. The next step is working through the fixes in order, from simplest to most involved.
Step by Step Fixes for a Blurry iPhone Camera
Follow these steps in order. Stop when the issue is resolved. Most people find the answer in the first three steps.
1. Clean the Lens Properly
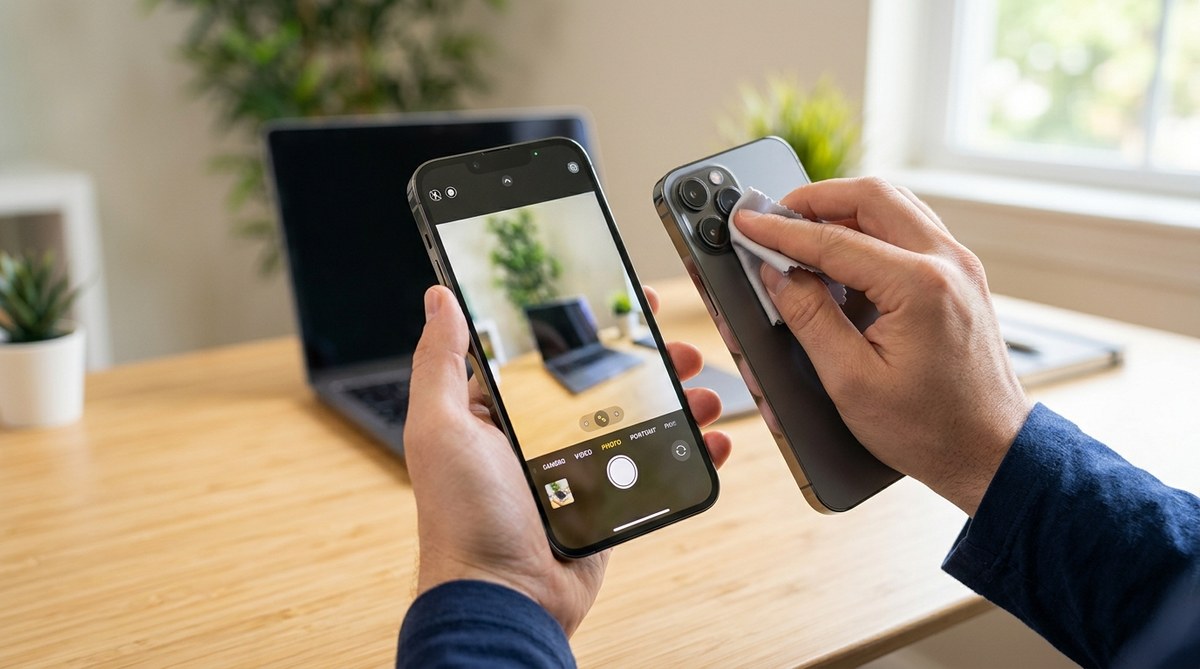
This is the number one fix and the easiest to overlook. Grab a soft, lint free microfiber cloth. If you do not have one, a clean eyeglass cloth works just as well. Gently wipe the lens in a circular motion. Do not use your shirt, paper towel, or any abrasive material. Those can leave micro scratches that make the problem worse.
If there is sticky residue or sunscreen on the lens, slightly dampen the cloth with a drop of water. Wipe dry immediately. Check your photos again.
2. Remove Your Case and Any Screen Protector
Many popular phone cases have a raised lip around the camera module. That lip can trap dust or press against the lens ring. Pop the case off completely. Take off any rear screen protector or lens cover as well. Some aftermarket lens protectors cause ghosting and loss of sharpness.
Take a test photo with the bare phone. If it looks sharp again, the case or protector was the issue.
3. Tap to Focus and Adjust Exposure
Open the Camera app. Tap on the main subject of your photo. A yellow square appears and the camera tries to lock focus on that spot. If you are shooting something close, make sure you are not in macro mode by accident. The iPhone automatically switches to the ultra wide lens for close ups, which can look softer.
After tapping, slide your finger up or down on the sun icon next to the focus square to adjust exposure. Sometimes the image is not truly blurry, just too bright or too dark to see detail.
4. Restart Your iPhone
A restart clears temporary software glitches that can affect the camera. Press and hold either volume button and the side button until you see the power off slider. Drag the slider, wait thirty seconds, then press and hold the side button again until the Apple logo appears.
Test the camera after the restart. This simple step fixes many post update issues.
5. Check for an iOS Update
Apple releases updates regularly to squash bugs, including camera related ones. Go to Settings > General > Software Update. If an update is available, download and install it. Make sure your phone is plugged in and connected to Wi Fi. After the update restarts your device, open the camera and test.
If you have noticed the camera getting worse right after a recent update, you are not alone. Many users report blurry cameras after major iOS versions. Installing the latest patch often resolves it. For more help with post update slowdowns, read our guide on how to speed up a slow iPhone after an iOS update.
6. Reset All Settings
This step does not erase your photos, messages, or apps. It resets preferences like Wi Fi passwords, wallpaper, and privacy settings. It can fix corrupted camera settings that a normal restart misses.
Go to Settings > General > Transfer or Reset iPhone > Reset > Reset All Settings. Your phone restarts. Reconnect to Wi Fi and test the camera. For a deeper look at what this process does, check out our guide on how to reset iPhone settings without data loss.
7. Force Close the Camera App and Reopen
Sometimes the camera app itself gets stuck. Swipe up from the bottom of the screen and pause to open the app switcher. Find the Camera app card and swipe it up to close it. Wait a few seconds, then tap the Camera icon again.
This clears any temporary glitch that was hanging onto a bad focus lock or a corrupted preview buffer.
8. Try Safe Mode or Diagnostics
If you use a lot of third party camera apps, one of them might interfere with the native camera. Boot your iPhone into safe mode (the process varies by model, but generally involves holding the volume buttons during startup). If the camera works fine in safe mode, uninstall recently added camera apps one by one until the issue goes away.
You can also run a diagnostic using Apple Support or a trusted repair tool. This checks the camera module, OIS, and sensor alignment.
Camera Settings Cheat Sheet
The table below shows common camera issues and the fix that works best for each one.
| What You See | Most Likely Fix | Try Next |
|---|---|---|
| Entire image is soft or hazy | Clean the lens with a microfiber cloth | Remove case and test |
| Blurry only in low light | Tap to focus and hold steady, use a tripod | Enable Night mode manually |
| Blurry in macro mode (close ups) | Step back 6 to 8 inches from the subject | Disable Macro Control in Settings |
| One side of the photo is out of focus | Check for OIS rattling by shaking the phone gently | Schedule a repair |
| Camera shows black or gray screen | Restart the phone | Force close and reopen the app |
| Blurry after a software update | Install the latest iOS update | Reset All Settings |
| Photos look soft only in third party apps | Update the app or use the native Camera app | Reinstall the third party app |
| Front camera is blurry but rear is fine | Clean the front lens above the display | Remove screen protector |
Keep this table handy. If the problem comes back weeks later, you can scan the symptoms and fix it in seconds.
When to Suspect Hardware Damage
Software fixes work about eight out of ten times. But sometimes the problem is physical. Here are signs that point to hardware failure:
- The camera lens rattles when you shake the phone. This indicates a broken OIS spring or a dislodged lens element.
- A visible scratch, crack, or chip on the camera lens cover.
- The image is blurry in the exact same spot every time, regardless of focus or lighting.
- There is fog, condensation, or moisture trapped inside the lens.
- The camera app shows a black screen or a flickering image on one of the lenses only.
Expert tip. Before you book a repair, test the camera in safe mode and after a full settings reset. If the blur is still there, hardware is the likely cause. A damaged OIS module or scratched lens cover cannot be fixed with software. They require a professional replacement. If your phone is still under warranty or covered by AppleCare+, the repair may be free or heavily discounted. Check your coverage in Settings > General > About > Coverage.
If you suspect hardware damage, back up your data and visit an Apple Store or an authorized service provider. Do not try to open the camera module yourself. The components are tiny and easy to break further.
How to Prevent Blurry Photos Going Forward
You fixed the problem. Now keep it from coming back. A few simple habits go a long way.
- Wipe the lens before every important shot. A quick swipe with your sleeve is not enough. Use a cloth kept in your bag or pocket.
- Avoid placing your phone face down on dirty surfaces. That is how pocket lint and sand end up around the camera ring.
- Update iOS regularly. Apple fixes camera bugs in nearly every update. Staying current reduces the chance of a software related blur.
- Use a camera friendly case. Look for cases with a precise cutout that does not overlap the lens even by a millimeter.
- Keep your iPhone away from extreme heat. Hot cars and direct sunlight can soften the adhesive that holds the lens in place and cause OIS failure over time.
- Do not use third party lens attachments unless they are high quality. Cheap clip on lenses degrade sharpness and can scratch the original lens.
Beyond the camera itself, general phone health matters too. A device that runs smoothly tends to have fewer sensor and processing errors. You can boost your iPhone performance with these simple tips to keep everything running well.
When All Else Fails, Get a Professional Look
You have cleaned the lens, removed the case, restarted the phone, updated iOS, and reset settings. The camera is still blurry. That is frustrating, but it is also a clear signal. The problem is likely inside the phone.
Book an appointment at an Apple Genius Bar or an Apple Authorized Service Provider. A technician can run a full camera diagnostic in minutes. If the camera module needs to be replaced, they will give you a quote before doing any work.
In the meantime, you can still take decent photos using the front camera or by holding the phone extra steady and using the volume button as a shutter. Those workarounds are not ideal, but they buy you time until the repair is done.
A blurry iPhone camera is almost always fixable. Most people solve it in the first few steps without spending a dime. Start with the lens, work through the list, and you will likely be taking sharp photos again before lunch.
If you run into other issues along the way, like your phone feeling sluggish or apps crashing after the update, our guide on troubleshooting common iPhone app crashes and freezes can help you get everything back on track. You have got this.