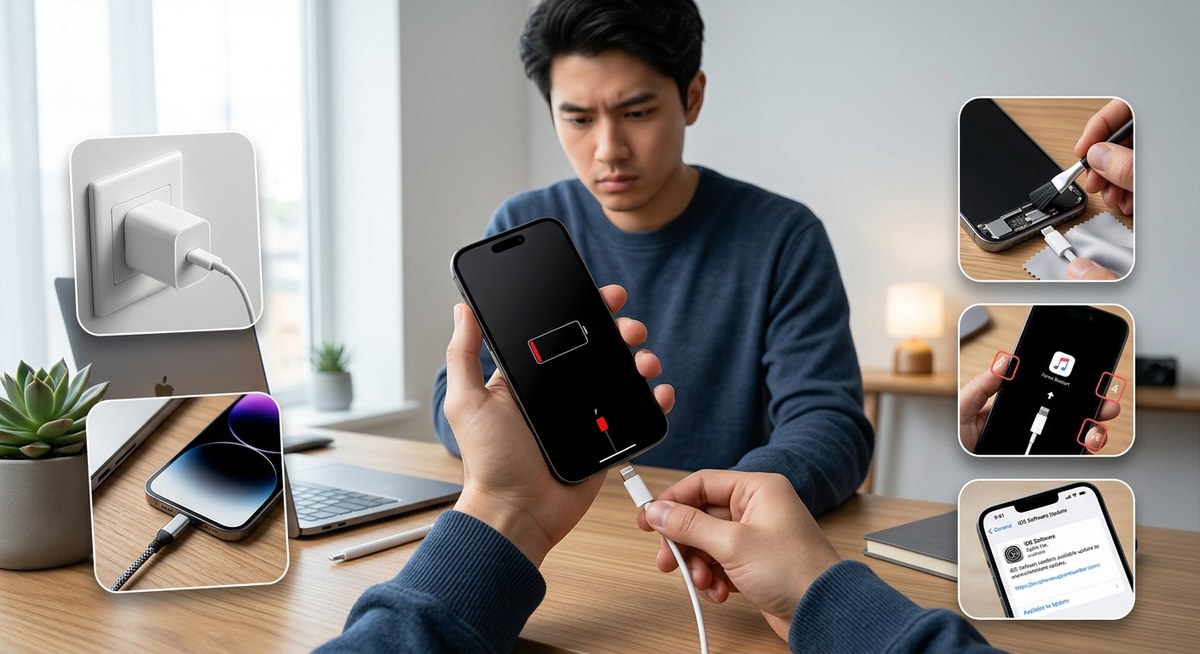
You plug in your iPhone before bed, but when you wake up, the battery is still at 12%. Maybe you are on a road trip and the battery icon just won’t budge. That moment of panic is something almost every iPhone owner has felt. The good news? Most charging problems have simple causes. You do not need to rush to a repair shop or buy a new phone. In fact, many of these issues can be solved in under five minutes with things you already have at home.
When your iPhone screen stays dark after plugging it in, the frustration is real. Before you panic, try these 5 proven fixes. Start by checking your charging cable and power adapter for damage. Next, inspect the Lightning or USB-C port for debris. A simple cleaning often solves the problem. If not, a force restart can clear temporary glitches. Temperature matters too. We walk you through each step so you can get back to using your phone.
Why Your iPhone Stops Charging All of a Sudden
Charging problems usually fall into one of three categories: a physical issue with the cable or port, a software glitch that confuses the power management system, or an environmental factor like heat or cold. Sometimes the phone is actually charging but so slowly that it appears frozen. Other times the phone recognizes the cable but refuses to pull power. The steps below cover all of these scenarios. They are listed in the order you should try them, starting with the simplest and moving toward more involved fixes.
Before you start, place your iPhone on a flat, sturdy surface. Make sure you have good lighting so you can see inside the charging port. And if your phone feels hot to the touch, let it cool down for 20 minutes before trying anything else.
Fix 1. Check Your Cable, Adapter, and Wall Outlet
This might sound too basic, but it is the most common cause of an iPhone not charging. Cables wear out. Adapters fail. Outlets stop working.
Follow these steps in order:
- Swap the cable. Use a different Lightning or USB-C cable that you know works with another device. If your iPhone starts charging, the original cable is the problem. Throw it away and get a new one from Apple or a certified brand.
- Test the wall adapter. Plug the same cable into a different power brick. Many people do not realize that the small cube can fail internally even if it looks fine. Try a friend’s adapter or a laptop USB port.
- Try a different outlet. Wall outlets in older homes can be finicky. Move to a kitchen or bathroom outlet, or plug into a power strip with a surge protector.
- Check for wireless charging. If your iPhone model supports wireless charging (iPhone 8 and later), place it on a Qi pad. If it charges wirelessly but not through the port, the port itself or the cable is likely the culprit.
Expert advice: Most charging cables fail at the connector ends, not in the middle. Look closely where the cable meets the plug. If you see fraying, discoloration, or bending, replace it immediately. A damaged cable can also be a fire risk.
Fix 2. Clean the Charging Port
Pocket lint, dust, and crumbs are silent enemies of the charging port. Over weeks and months, debris gets packed into the bottom of the port and prevents the plug from making full contact. The cable might click in, but the connection is not solid.
Here is what you will need:
- A wooden toothpick (not metal)
- A small flashlight or a bright phone light
- Compressed air (optional)
How to clean it safely:
- Turn off your iPhone to avoid any electrical issues.
- Shine the light into the port. Look for a clump of gray or brown material at the back.
- Gently scrape the debris out using the toothpick. Move from side to side, not straight down, so you do not damage the pins.
- Blow short bursts of compressed air at an angle to dislodge loose particles.
- Plug in the cable and see if it clicks fully. You should feel a solid snap.
| What to use | What to avoid |
|---|---|
| Wooden toothpick | Metal paperclips (they short pins) |
| Soft bristle brush (clean toothbrush) | Needles or safety pins |
| Compressed air (canned) | Vacuum cleaners (static damage) |
| Isopropyl alcohol on a swab (for sticky residue) | Water or liquid cleaners |
A clean port fixes roughly one in three charging failures. It is the most overlooked fix on this list.
Fix 3. Force Restart Your iPhone
Sometimes the software that manages charging gets stuck. Your iPhone might think it is charging when it is not, or it might ignore the power source entirely. A force restart clears the phone’s memory without deleting any of your data.
The button sequence depends on your model:
For iPhone 8, iPhone SE (2nd and 3rd gen), and later models (including all iPhone 14, 15, and 16 series):
1. Press and release the Volume Up button.
2. Press and release the Volume Down button.
3. Press and hold the Side button (the power button on the right) until the Apple logo appears. This takes about 10 seconds.
For iPhone 7 and iPhone 7 Plus:
1. Press and hold both the Volume Down button and the Sleep/Wake button.
2. Keep holding until the Apple logo shows up.
For iPhone 6s and earlier:
1. Press and hold both the Home button and the Top (or Side) button.
2. Release when you see the Apple logo.
After the phone restarts, plug it in and wait 30 seconds. If the battery icon shows a lightning bolt, the software was the problem and you are back in business. If you notice other performance issues after the restart, take a look at this guide on top tips to improve iPhone performance and speed up your device.
Fix 4. Watch the Temperature and Check Battery Health
iPhones are temperature sensitive. If the device is too hot or too cold, it will stop charging to protect the battery. This is a built in safety feature, not a defect.
Signs of a temperature issue:
– The phone feels warm or hot to the touch.
– A temperature warning screen appears.
– Charging stops at a certain percentage and does not resume until the phone cools.
If your phone is hot, remove the case, move it to a cooler room, and let it sit for 20 minutes. Do not put it in the refrigerator. Rapid cooling can cause condensation inside the port.
If temperature is not the issue, check your battery health. Go to Settings > Battery > Battery Health & Charging. Look at the Maximum Capacity percentage.
- Above 80%: Your battery is in good shape. The problem is likely something else.
- Below 80%: Your battery is considered degraded. It may still charge, but it will drain faster and may show erratic behavior. iOS may also slow down the phone to prevent unexpected shutdowns.
A degraded battery can mimic a charging failure. The phone accepts power, but the battery cannot hold it. If you see “Service Recommended” in the Battery Health menu, consider a replacement. For more tips on extending battery life, check out these ideas to optimize your iPhone battery life with simple settings tweaks.
Fix 5. Update iOS or Adjust Charging Settings
Software updates often include fixes for power management bugs. If your iPhone has not been updated in a while, a glitch could be blocking the charge.
- Go to Settings > General > Software Update.
- If an update is available, download and install it. Make sure your phone has at least 50% battery or is plugged in.
- After the update, test charging again.
Another setting to check is Optimized Battery Charging. This feature learns your daily routine and delays charging past 80% until you need it. If you plug in your phone at night, it may sit at 80% until just before you wake up. That is normal behavior, not a problem.
- You can turn it off temporarily by going to Settings > Battery > Battery Health & Charging and toggling off Optimized Battery Charging.
- If your phone charges past 80% after turning this off, the feature was the reason for the pause.
For a deeper look at how your iPhone manages power, read this guide on how to fix common iPhone battery drain issues quickly.
When Hardware Damage Is the Real Cause
If you have tried all five fixes above and your iPhone still shows no sign of charging, the problem may be hardware related. Liquid damage is a common hidden cause. Even a few drops of rain or sweat from a workout can corrode the charging port pins over time.
Signs of hardware damage:
– The cable slides in too easily or feels loose.
– You see rust or green residue inside the port.
– The phone vibrates or shows the charging icon on and off repeatedly.
– An “Accessory Not Supported” alert appears even with an Apple cable.
Another possibility is a damaged charging IC (integrated circuit) on the logic board. This chip controls power flow. When it fails, the phone may not respond to any charger at all. This type of damage usually requires professional repair.
If you suspect hardware damage, do not try to fix it yourself with tools from the internet. Opening an iPhone without the right equipment can cause more harm. Instead, contact Apple Support or visit a certified repair center. You can also try a wireless charger as a temporary workaround if your model supports it.
Putting It All Together: Your Charging Troubleshooting Toolkit
The table below summarizes what to try depending on your specific symptoms. Use it as a cheat sheet the next time your iPhone refuses to charge.
| Symptom | Most likely fix | Try this next |
|---|---|---|
| No response at all when plugged in | Check cable and adapter | Clean the port |
| Charges but very slowly | Clean the port | Check for overheating |
| Stops at 80% | Disable Optimized Battery Charging | Update iOS |
| Charging icon blinks on and off | Inspect cable for damage | Try a different outlet |
| Works with wireless but not cable | Clean the port | Check for debris or damage |
| “Accessory Not Supported” message | Clean the port | Try a certified Apple cable |
If you are still stuck after running through this list, do not stress. Sometimes the issue is deeper and needs a specialist. Before you take that step, you can also try how to reset iPhone settings without data loss to rule out any misconfigured system settings that might interfere with charging.
Keep Your iPhone Charging Reliably From Now On
A phone that does not charge is more than an inconvenience. It cuts you off from calls, maps, messages, and photos. The good news is that most charging failures are fixable in a few minutes with nothing more than a toothpick and a fresh cable. Make it a habit to check your charging port every month. Keep an eye on your cable ends for wear. And always let your iPhone cool down before plugging it in during hot weather.
Try these steps the next time your battery icon stays red. You will likely save yourself a trip to the store and a headache. And if you run into other issues like apps crashing or Wi-Fi dropping, check out our guide on troubleshooting guide for iPhone Wi-Fi connectivity problems to keep your device running smoothly all day long.